Instructions: Difference between revisions
Jump to navigation
Jump to search
| (4 intermediate revisions by the same user not shown) | |||
| Line 1: | Line 1: | ||
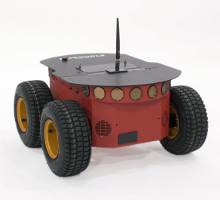
[[Image:Icon pioneer3AT.png|thumb|P3-AT]] | |||
== About == | == About == | ||
This page presents practical instructions for the Pioneer P3-AT. The use of this robot requires an external laptop for running the main software. | This page presents practical instructions for the Pioneer P3-AT. The use of this robot requires an external laptop for running the main software. | ||
== Hardware == | |||
The autonomy of this robots is not very large. If the robot is not physically running (making changes in code, debug, etc etc) keep it plugged to the provided power adapter. | |||
A red emergency button in placed on top of the robot. Check if it is not pressed when you want the robot to move. | |||
== Software == | |||
Both the robot and SICK drivers are already installed on the robot. | |||
== Robot Usage == | == Robot Usage == | ||
| Line 9: | Line 21: | ||
* Plug the ethernet cable to your PC | * Plug the ethernet cable to your PC | ||
* The robot has a fixed IP: 192.168.1.2 | * The robot has a fixed IP: 192.168.1.2 | ||
* Connect via ssh. Username: maiss | * Connect via ssh. Username: maiss | Password: sistemasautonomos | ||
* roslaunch | * An example roslaunch is provided. It launches both the sick and the robot drivers | ||
** roslaunch maiss_nav robot.launch | |||
* To teleoperate (and test if the robot is OK) use the teleop_keybord: | |||
** rosrun maiss_nav teleop_keybord | |||
Latest revision as of 11:46, 21 October 2014

About
This page presents practical instructions for the Pioneer P3-AT. The use of this robot requires an external laptop for running the main software.
Hardware
The autonomy of this robots is not very large. If the robot is not physically running (making changes in code, debug, etc etc) keep it plugged to the provided power adapter.
A red emergency button in placed on top of the robot. Check if it is not pressed when you want the robot to move.
Software
Both the robot and SICK drivers are already installed on the robot.
Robot Usage
- Turn the robot on in the back part
- Check if the Sick Laser in on ( LEDs on the top)
- Plug the ethernet cable to your PC
- The robot has a fixed IP: 192.168.1.2
- Connect via ssh. Username: maiss | Password: sistemasautonomos
- An example roslaunch is provided. It launches both the sick and the robot drivers
- roslaunch maiss_nav robot.launch
- To teleoperate (and test if the robot is OK) use the teleop_keybord:
- rosrun maiss_nav teleop_keybord